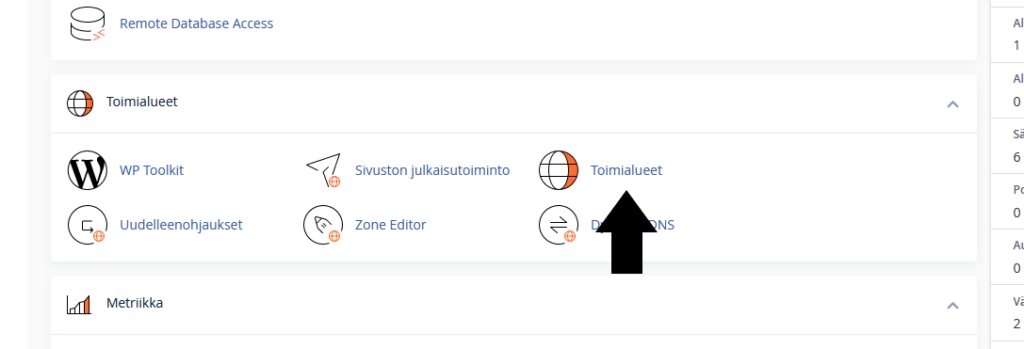
1. Find the Areas section in the cPanel.
Log in to the cPanel dashboard and go to the "Domains" section.
2. Create a subdomain
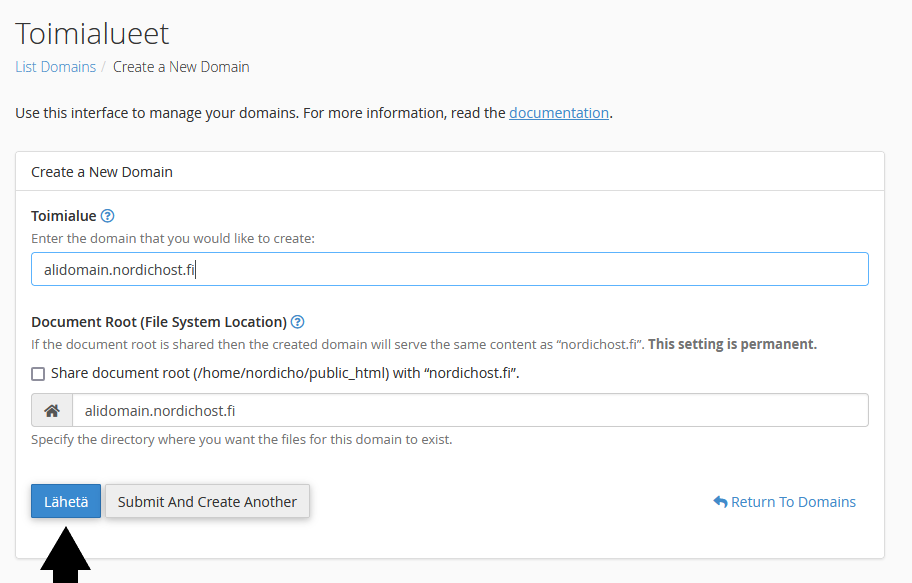
Next, click on "Create A New Domain".

3. Define alidomain
Enter the name of your new subdomain in the Domain field. For example, you can name it testisivusto.omadomain.fi. In the example below, I am creating an alidomain for nordichost.fi, which is called alidomain.
4. Install WordPress on the new subdomain
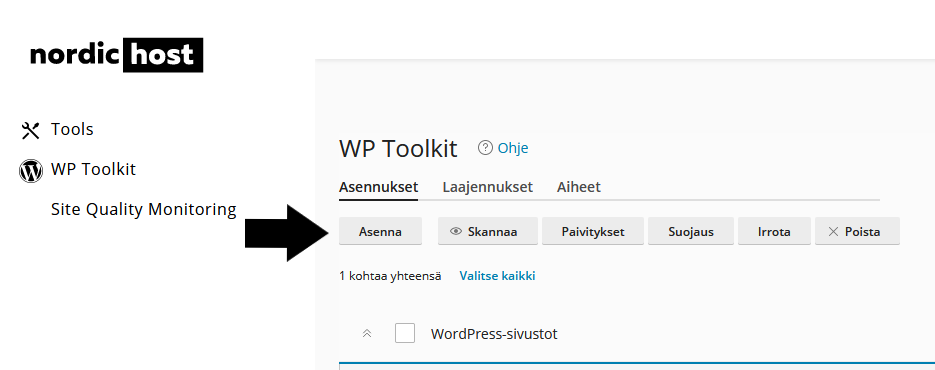
The Alidomain has now been created. Next, we will install a WordPress page on the newly created subdomain. Go to the WP Toolkit section in the top left corner and click on the "Install" button.
5. Install and configure WordPress settings
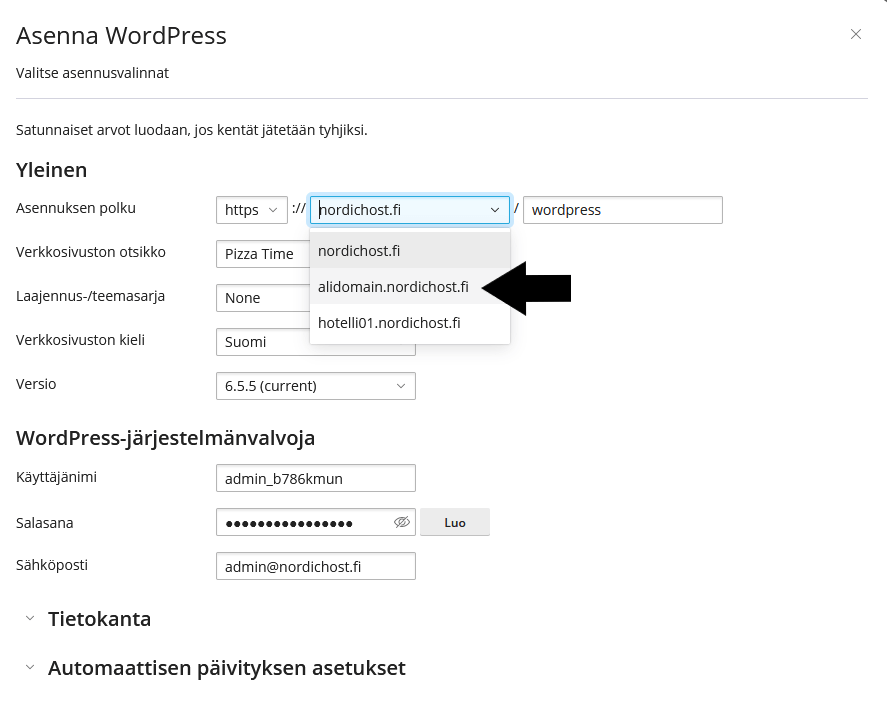
Under "Installation path", change the domain to the alias domain you just created. Next, define the Website title, language, username, password and other important information. When you are ready, click "Install". Please note that the subdomain may not always work immediately. This is because it takes a while for the A-record to be updated. cPanel has automatically added the A-record to the DNS records, which redirects the newly created alidomain to the server IP.
6. Follow-up measures
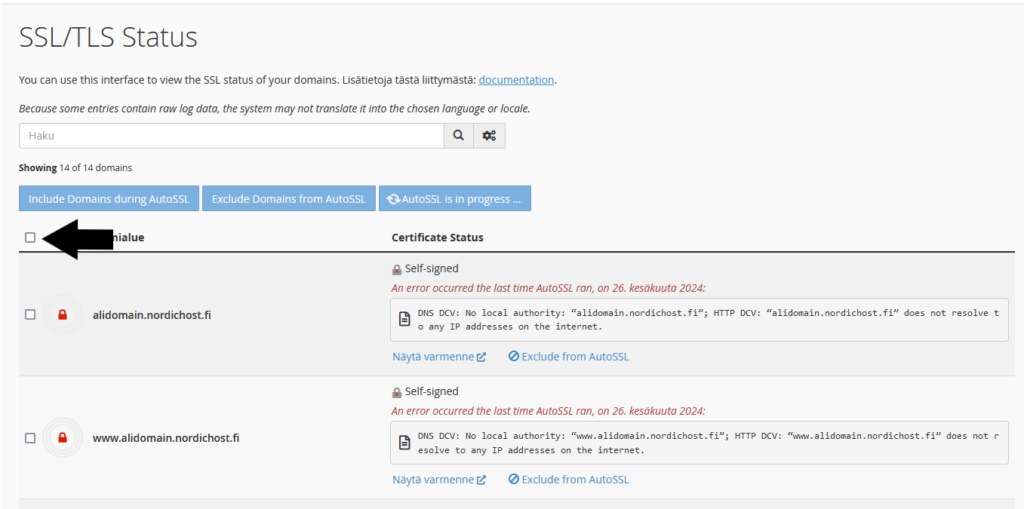
When you access your subdomain, it means that you can use it and also install SSL on the subdomain. Installing SSL on your subdomain is quick and easy. To install SSL, go to the SSL/TLS Status section in cPanel.

Click on the checkbox as shown in the picture. If you see "AutoSSL is in progress" or other errors, you cannot yet install SSL, as you must wait for the A records to be updated first.
Once you have configured SSL, go to the "Domains" section and click on "Force HTTPS redirect" under the subdomain.
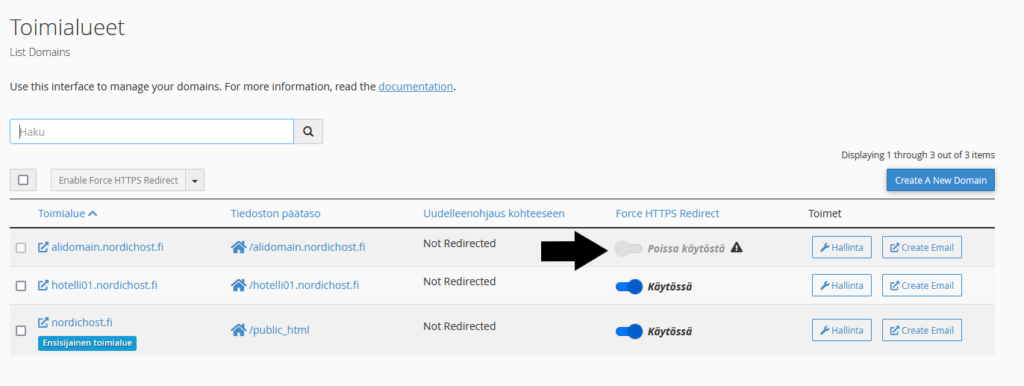
Everything is ready. The website domain has been created, WordPress installed and SSL successfully configured.


