Email deliverability is the likelihood that the emails you send will reach your recipients' inboxes and not the spam folder. Good deliverability is critical to email marketing and the effectiveness of your communications.
1. Confirm the sender's details
Use sender verification protocols such as SPF (Sender Policy Framework), DKIM (DomainKeys Identified Mail) and DMARC (Domain-based Message Authentication, Reporting & Conformance) to help prevent sender spoofing and improve the credibility of your emails.
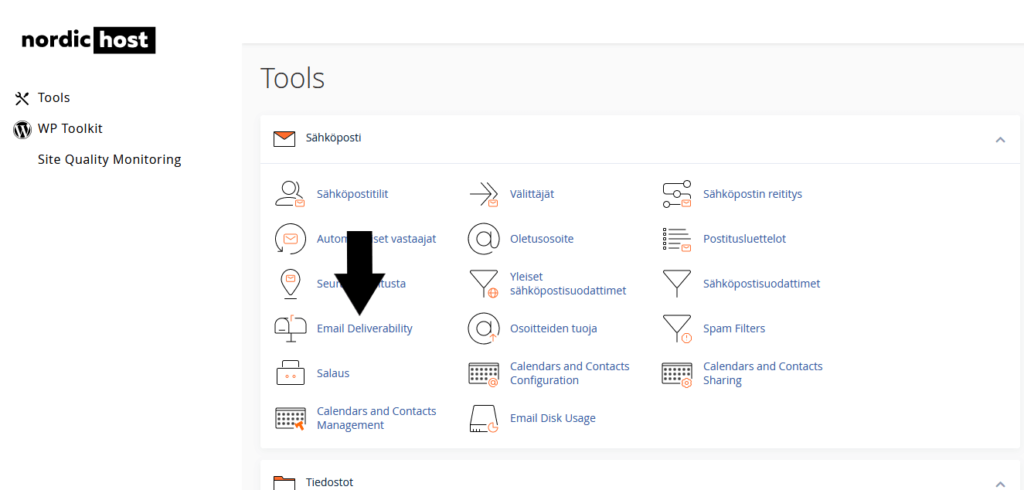
You can do this by clicking on Email Deliverability.
2. Go to the administration view
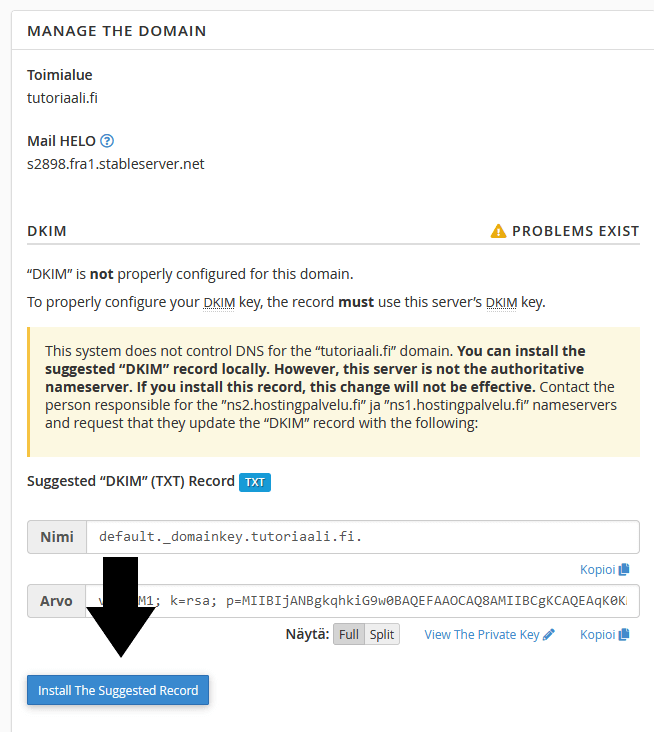
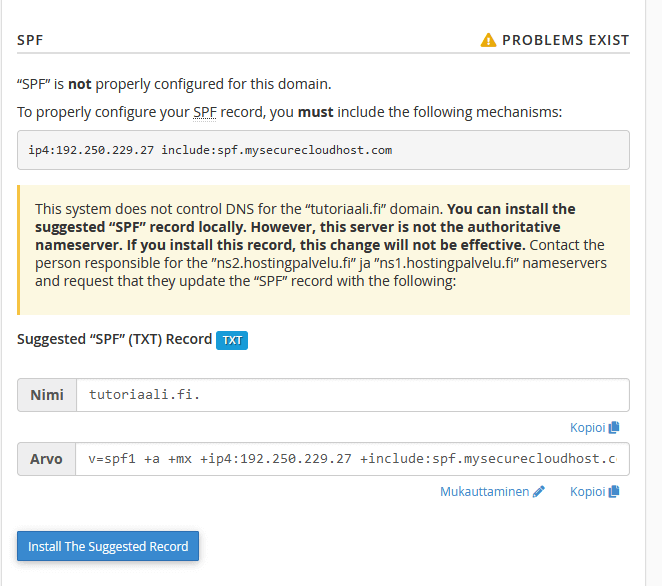
If you don't see the yellow "Problems Exist (DKIM and SPF)", you don't need to do anything. However, if you get a warning message that DKIM and SPF are not defined, proceed as instructed.

3. Fix the problems
Click the "Install the suggested records" button and the system will automatically add the necessary values to the DNS records. Perform the same process for the entries below.
4. Create a DMARC record
DMARC (Domain-based Message Authentication, Reporting, and Conformance) is a validation system that, together with SPF (Sender Policy Framework) and DKIM (DomainKeys Identified Mail) protocols, helps prevent email fraud and scams. DMARC works by adding an extra layer of verification to identify the sender of the email and allows recipients to specify what to do with messages that do not pass authentication checks. In this way, DMARC helps to improve email security and reduce the chances of scam messages reaching their intended recipients.
First, go to the Zone Editor section.
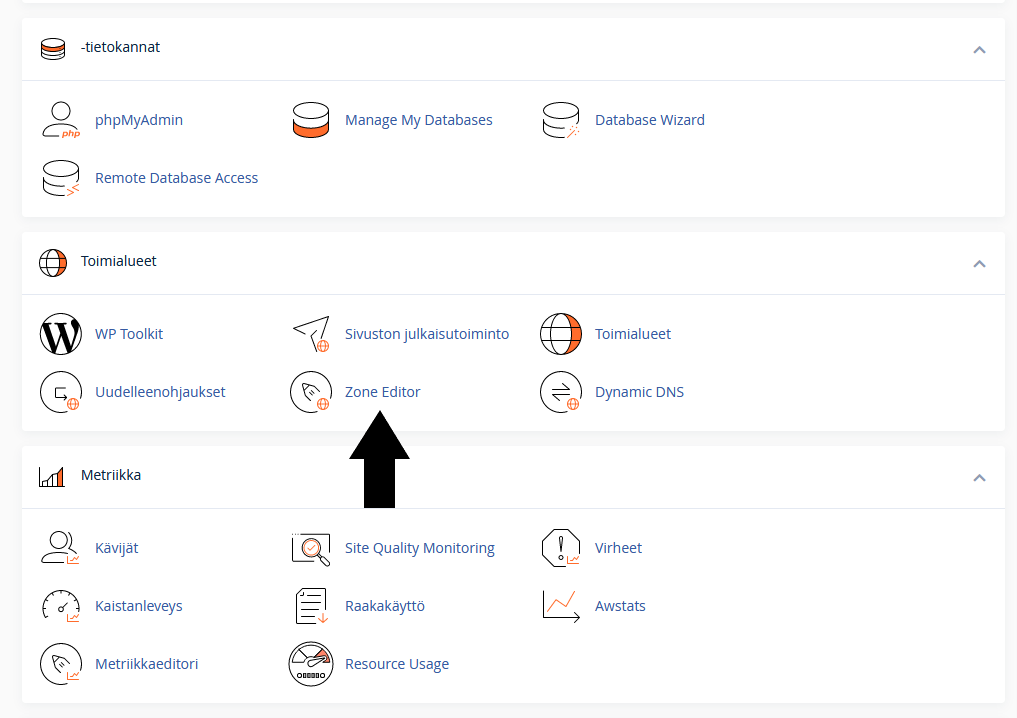
Next, click on "Administration".
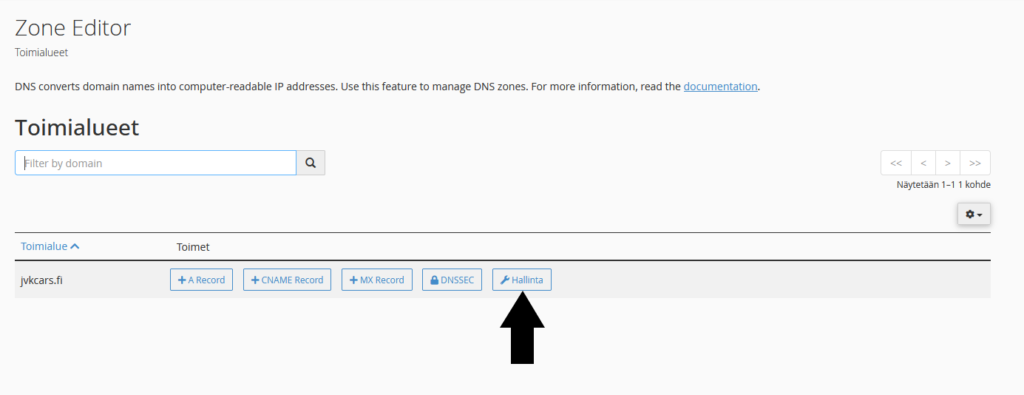
You will then be able to add the DMARC record. Click Add Record and then Add "DMARC" Record.
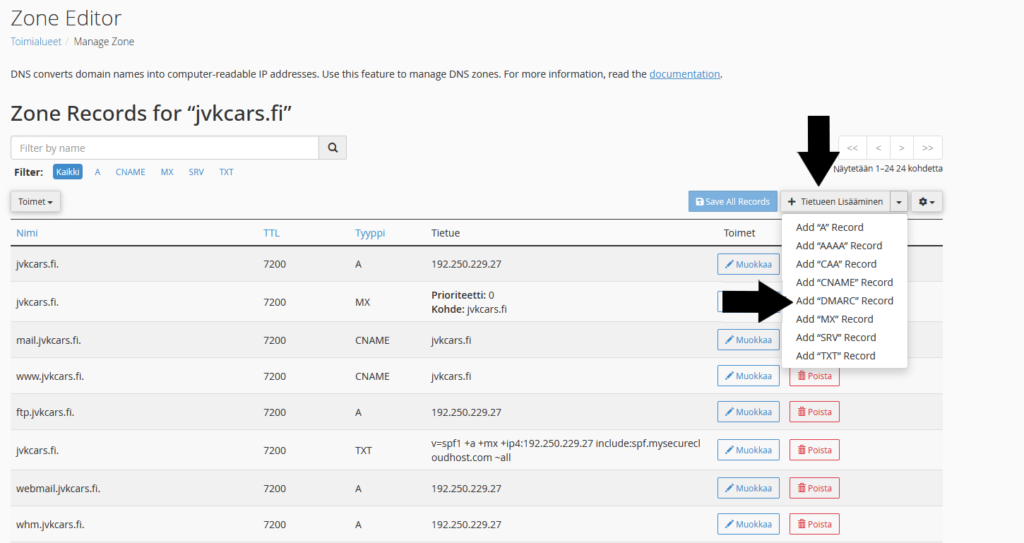
You can then configure the DMARC record settings. Click "None" and save the record by clicking Save Record.

DMARC has now been successfully created.
5. Configure SMTP settings
SMTP (Simple Mail Transfer Protocol) is a protocol used to send and receive email over the internet. SMTP is often used to improve the deliverability of emails sent from a website. By default, WordPress uses the PHP wp_mail() function to send emails, but this is not always reliable, as many mail servers mark these messages as spam or block them altogether.
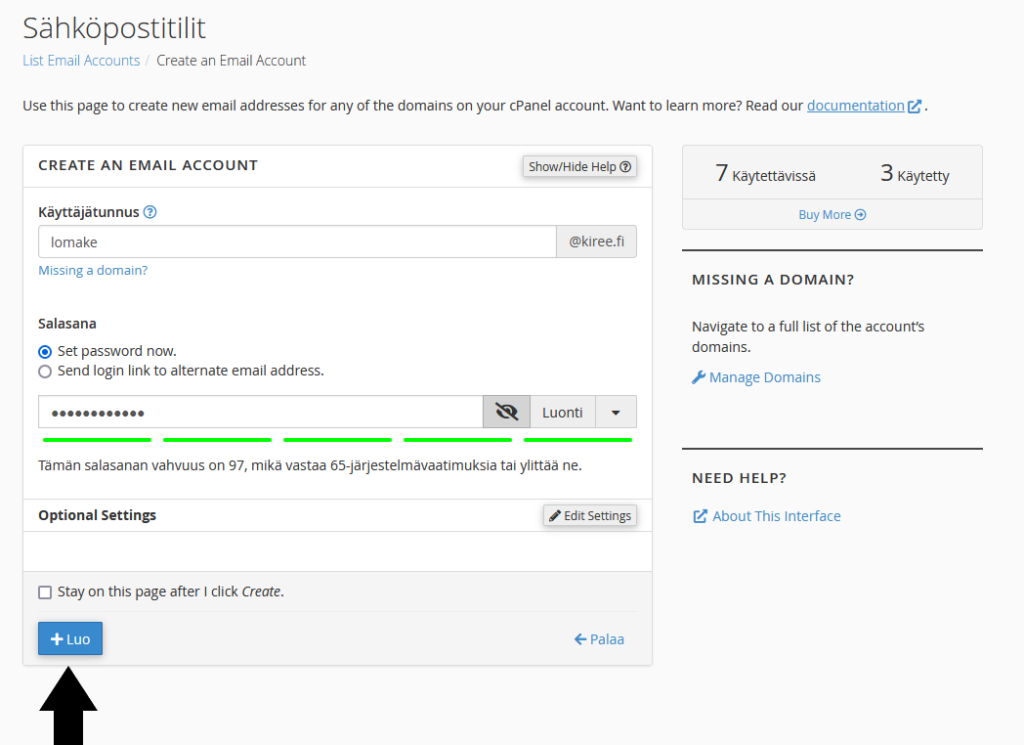
If you have a work email on cPanel, you can start by creating an email account. Go to the email accounts section and create an email account at [email protected]. Capture the password for the email account. If you have email elsewhere, e.g. on Google, go directly to the SMTP add-on installation.
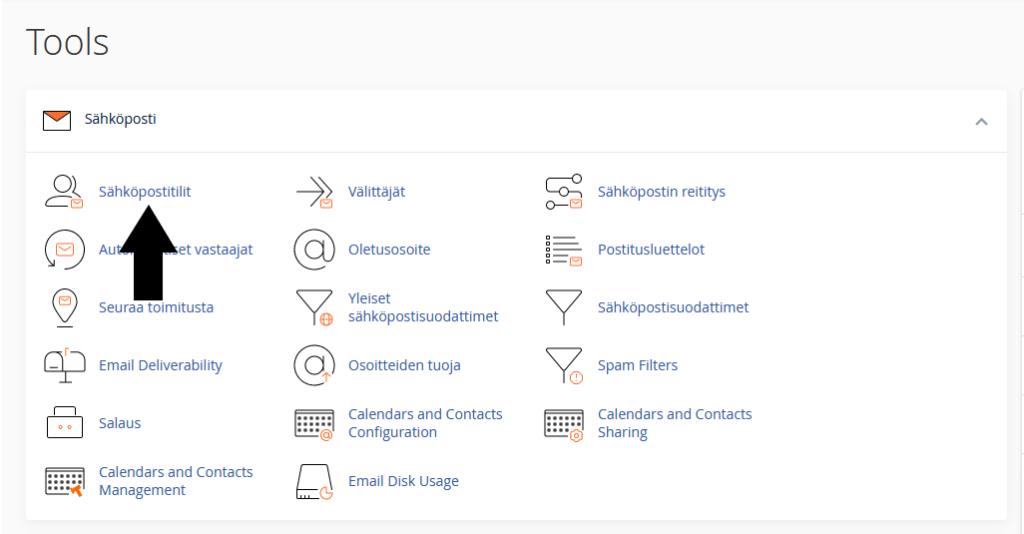
Click the Create button to create an email.
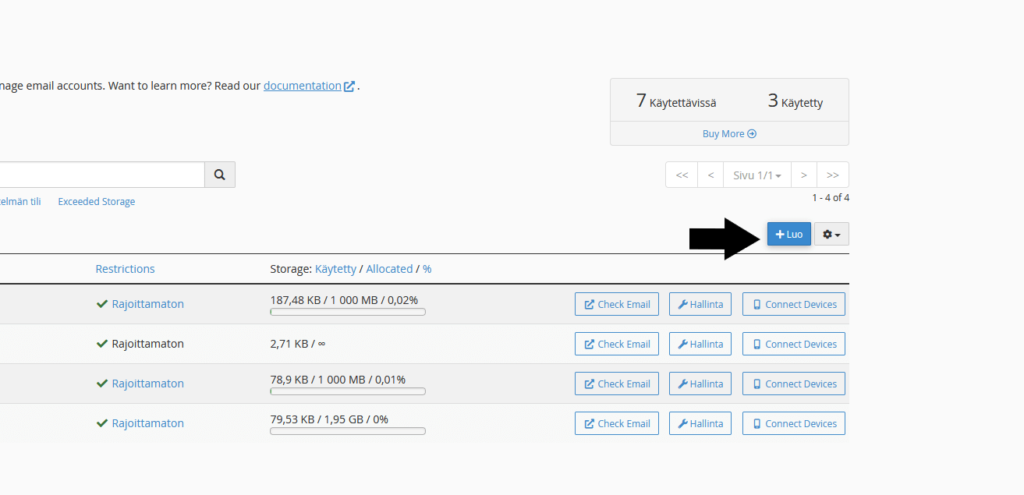
Configure your username to match, i.e. form and then specify the password. Make a copy of this password, as you will need it later. Then click Create.
SMTP add-on installation
Install next Easy WP SMTP WordPress plugin. You can also use another SMTP plugin if you wish. After installation, go to the Settings section.

Next, select Other SMTP from the list. If you use Gmail for work email, select Google from the list. Please note that for this SMTP add-on, using Google SMTP requires a paid version, so you can use the WP Mail SMTP -addendum to this. These add-ons don't differ much from each other, except for the appearance and the fact that Google SMTP is free in the WP Mail SMTP add-on. You can find more guidance here.
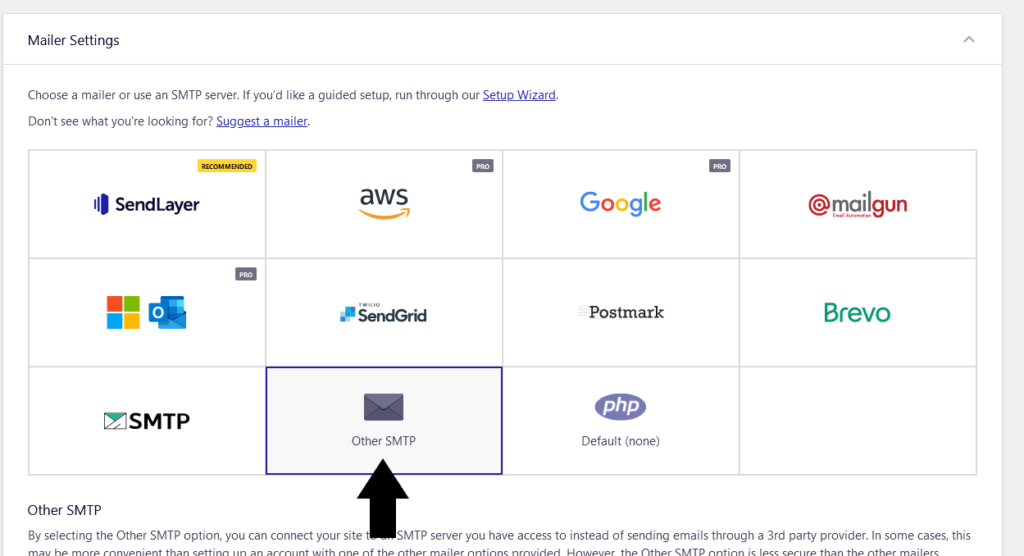
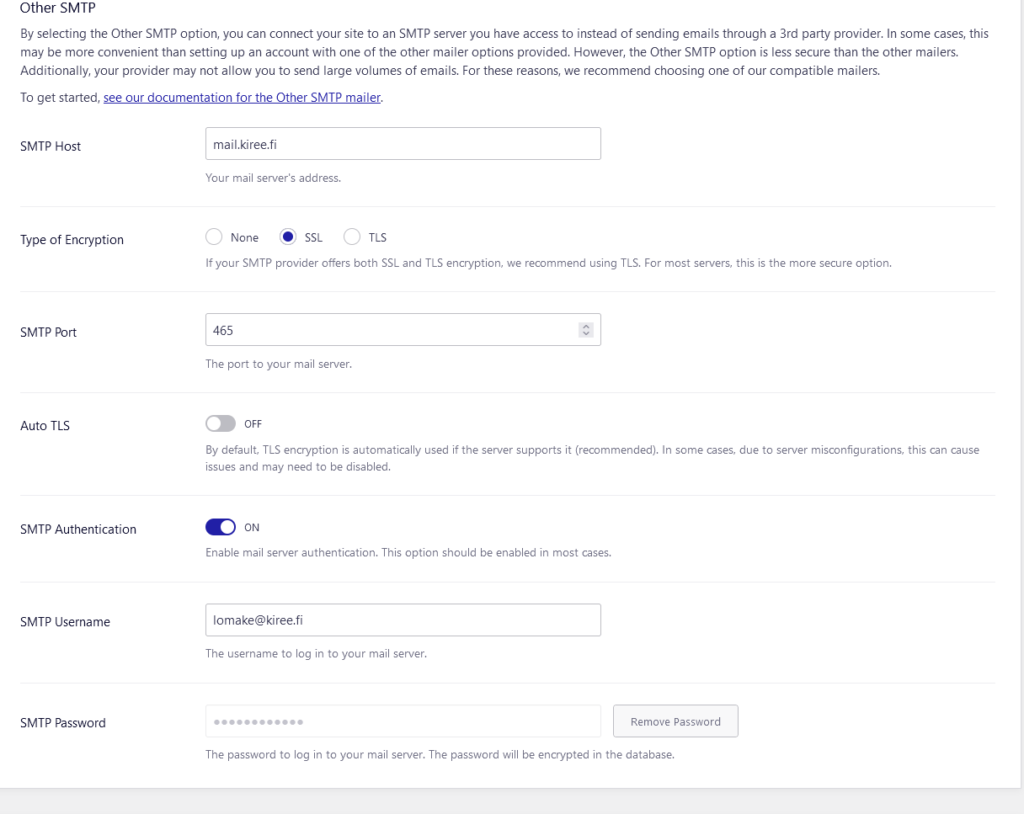
Add the following information, SMTP Host, Type of Encryption, SMTP Port, SMTP Username and SMTP Password. In the example below, the domain kiree.fi is used.
SMTP Host: mail.sinundomain.fi
Type of encryption: SSL
SMTP port: 465
Auto TLS: ON
SMTP Authentication: ON
SMTP Username: [email protected]
SMTP Password: [email protected] email account password
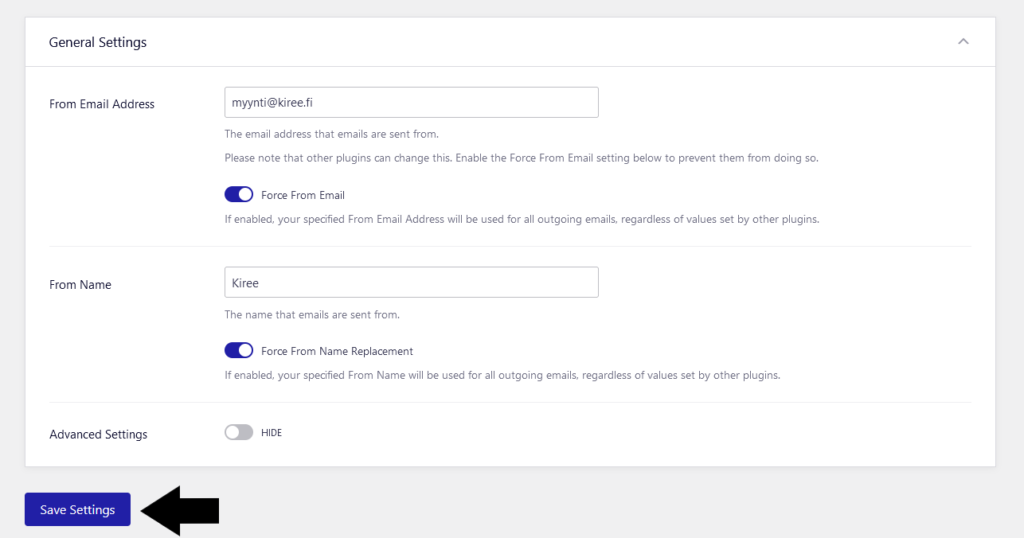
Next, specify the From Email Address and From Name fields. The Force From Email and Force From Name Replacement settings can be turned on.
From Email Address: The recipient of the email will see this as the sender of the email. Use an email that is representative, for example [email protected] or [email protected].
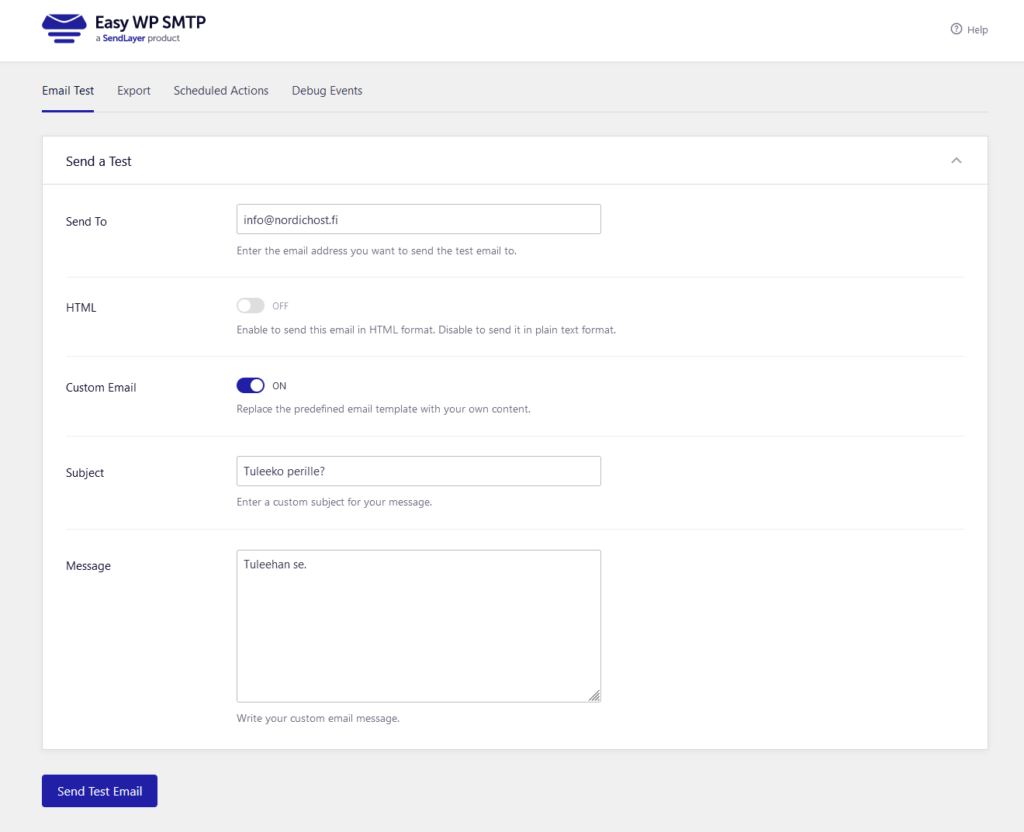
The SMTP settings are now configured. You can test the connection by clicking Send a Test.
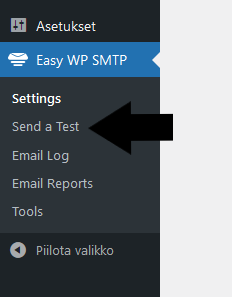
Next, enter an email, such as your own email account or similar, that you have access to. Wait a moment and check if your email was received. If it did, then SMTP is configured correctly. If you encountered problems configuring your SMTP settings, please contact support at [email protected].
6. Avoid being blacklisted
It is also important to keep the security of your website in order, as weak security can give an attacker access not only to your website but also to your email accounts. In this case, the attacker can use the accounts to send spam, which can damage your site's reputation and lead to blacklisting. By effectively securing your site, you will prevent such attacks and keep your users' data safe. Please read the following guide, where we discuss how you can maximise the security of your WordPress site.
If you encountered problems configuring your SMTP settings, please contact support at [email protected].


