- Log in to cPanel
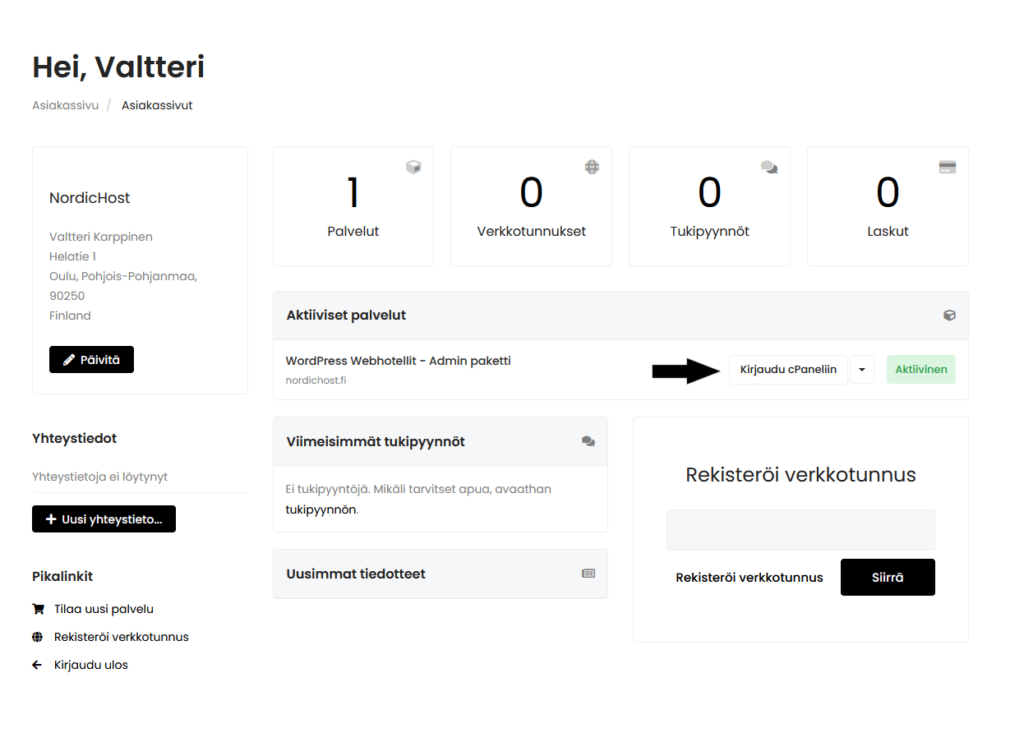
The first step is to log in to your cPanel account. This can be done by logging into your client account and clicking on the "Login to cPanel" button under the Active Services section.
- Go to WP Toolkit section
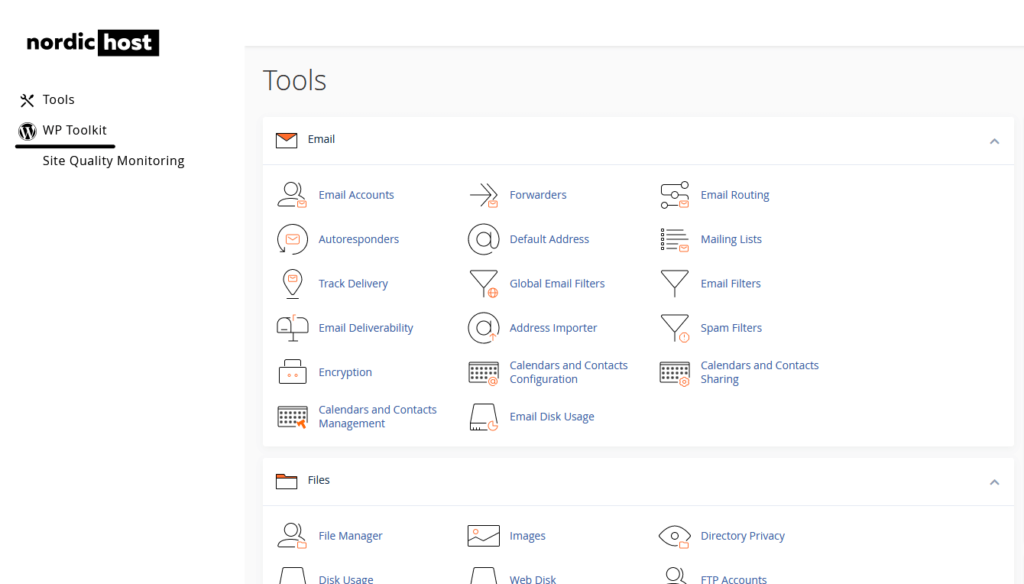
Once you are logged in, look for the WP Toolkit icon. Click on WP Toolkit to open it.
- Install a new WordPress site
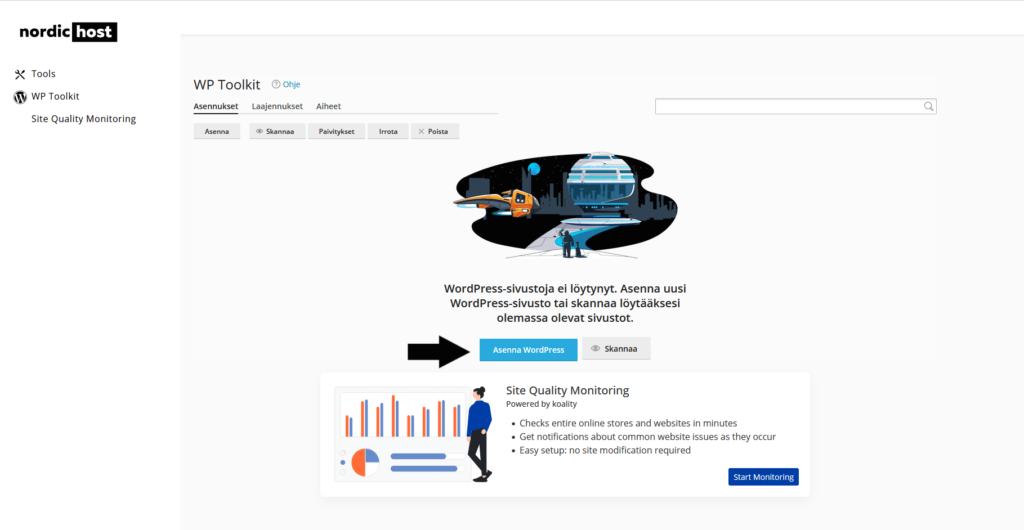
On the WP Toolkit main screen, you will see the option "Install WordPress". Click this to start a new WordPress installation.
- Fill in the installation details
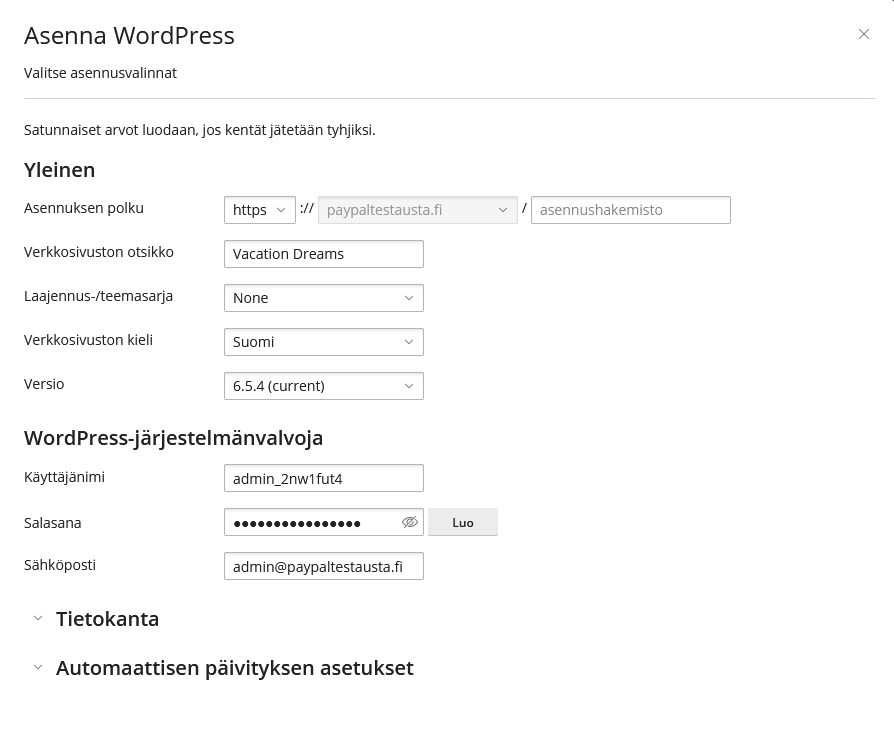
Next, enter the domain name you want to use on the page. Also specify the page title, language, root username, password and email.
- Configure advanced settings
To configure more advanced settings, such as database information or automatic updates, click on "Database" or "Automatic update settings". These default settings are sufficient for most people, so you don't need to touch them.
- Start the installation
Once you have filled in all the necessary information, click "Install". WP Toolkit will start the installation of WordPress. This may take a few minutes.
- Sign in to WordPress
You can log in to a new WordPress site as a root user by clicking "Sign in" in the WP Toolkit section.
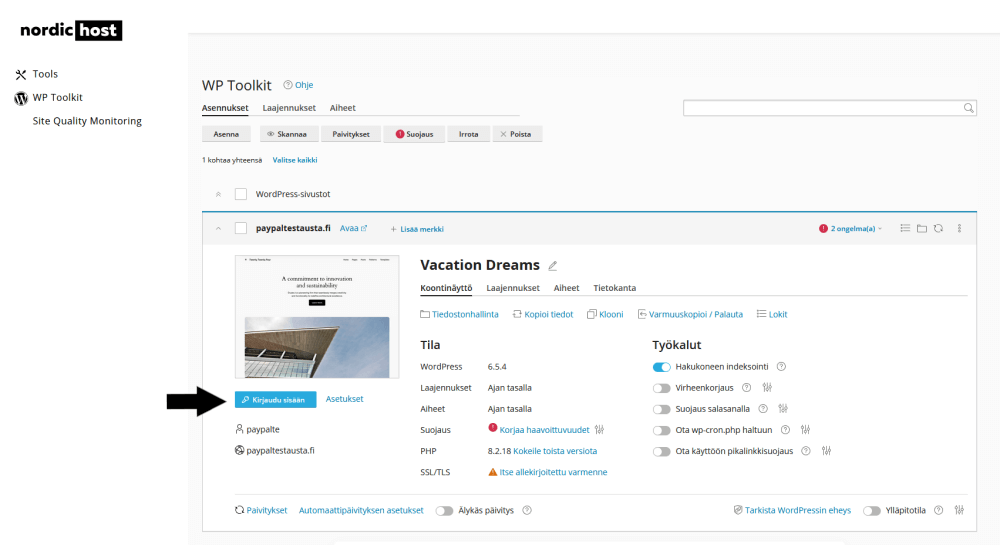
- Start editing your site
Now that you're logged in to the WordPress Dashboard, you can start editing your site. You can choose a theme, install plugins and add content according to your needs.
If you have any questions or need assistance, please do not hesitate to contact our customer service by email [email protected]
Good luck with your new WordPress site!


